Thursday, April 30, 2015

Out of Alberta - SWAP 2015 Complete

Phew, I was late to the game, but I completed my SWAP (sewing with a plan) this weekend.  This is an annual contest that runs from December through to April and involves making around 11 garments ( I think that the total may vary from year to year, and the rules certainly do).  This year, they were as follows:

This year, I'd like to see us turn our attention back a bit to the original concept of a wardrobe that works well together -pieces that all coordinate and form a cohesive collection with a huge number of possible combinations.  However, we're still a sewing board, and I still believe "sewing" should be the primary focus.

So.... Let's return to the tradition 11-garment format, with all the tops working with all the bottoms, and wildcard garments that work with every other item.  

This year, we need to make:

5 tops
3 bottoms
3 "wildcard" items

For our "sewing" focus -and this year's twist- let's make at least one garment that is reversible, transformable, or upcycled from another garment. For instance: a dress that can be worn as a shirt, a pair of pants that can roll up to be worn as shorts, or a jacket that can also be a dress.  "Upcycling" includes remaking an older garment into something new, taking a vintage pattern and modernizing it into a more current style, or recycling the fabrics or notions from another item to incorporate it into something new.  The original item to be reworked does not need to be a garment; you can remake a dozen scarves into a skirt or transform an old handbag into a collar and cuffs -use your imagination.
The "wild card" options can be just about anything you like, but they must be "garments" not accessories (hats, bags, blankets, etc.) 

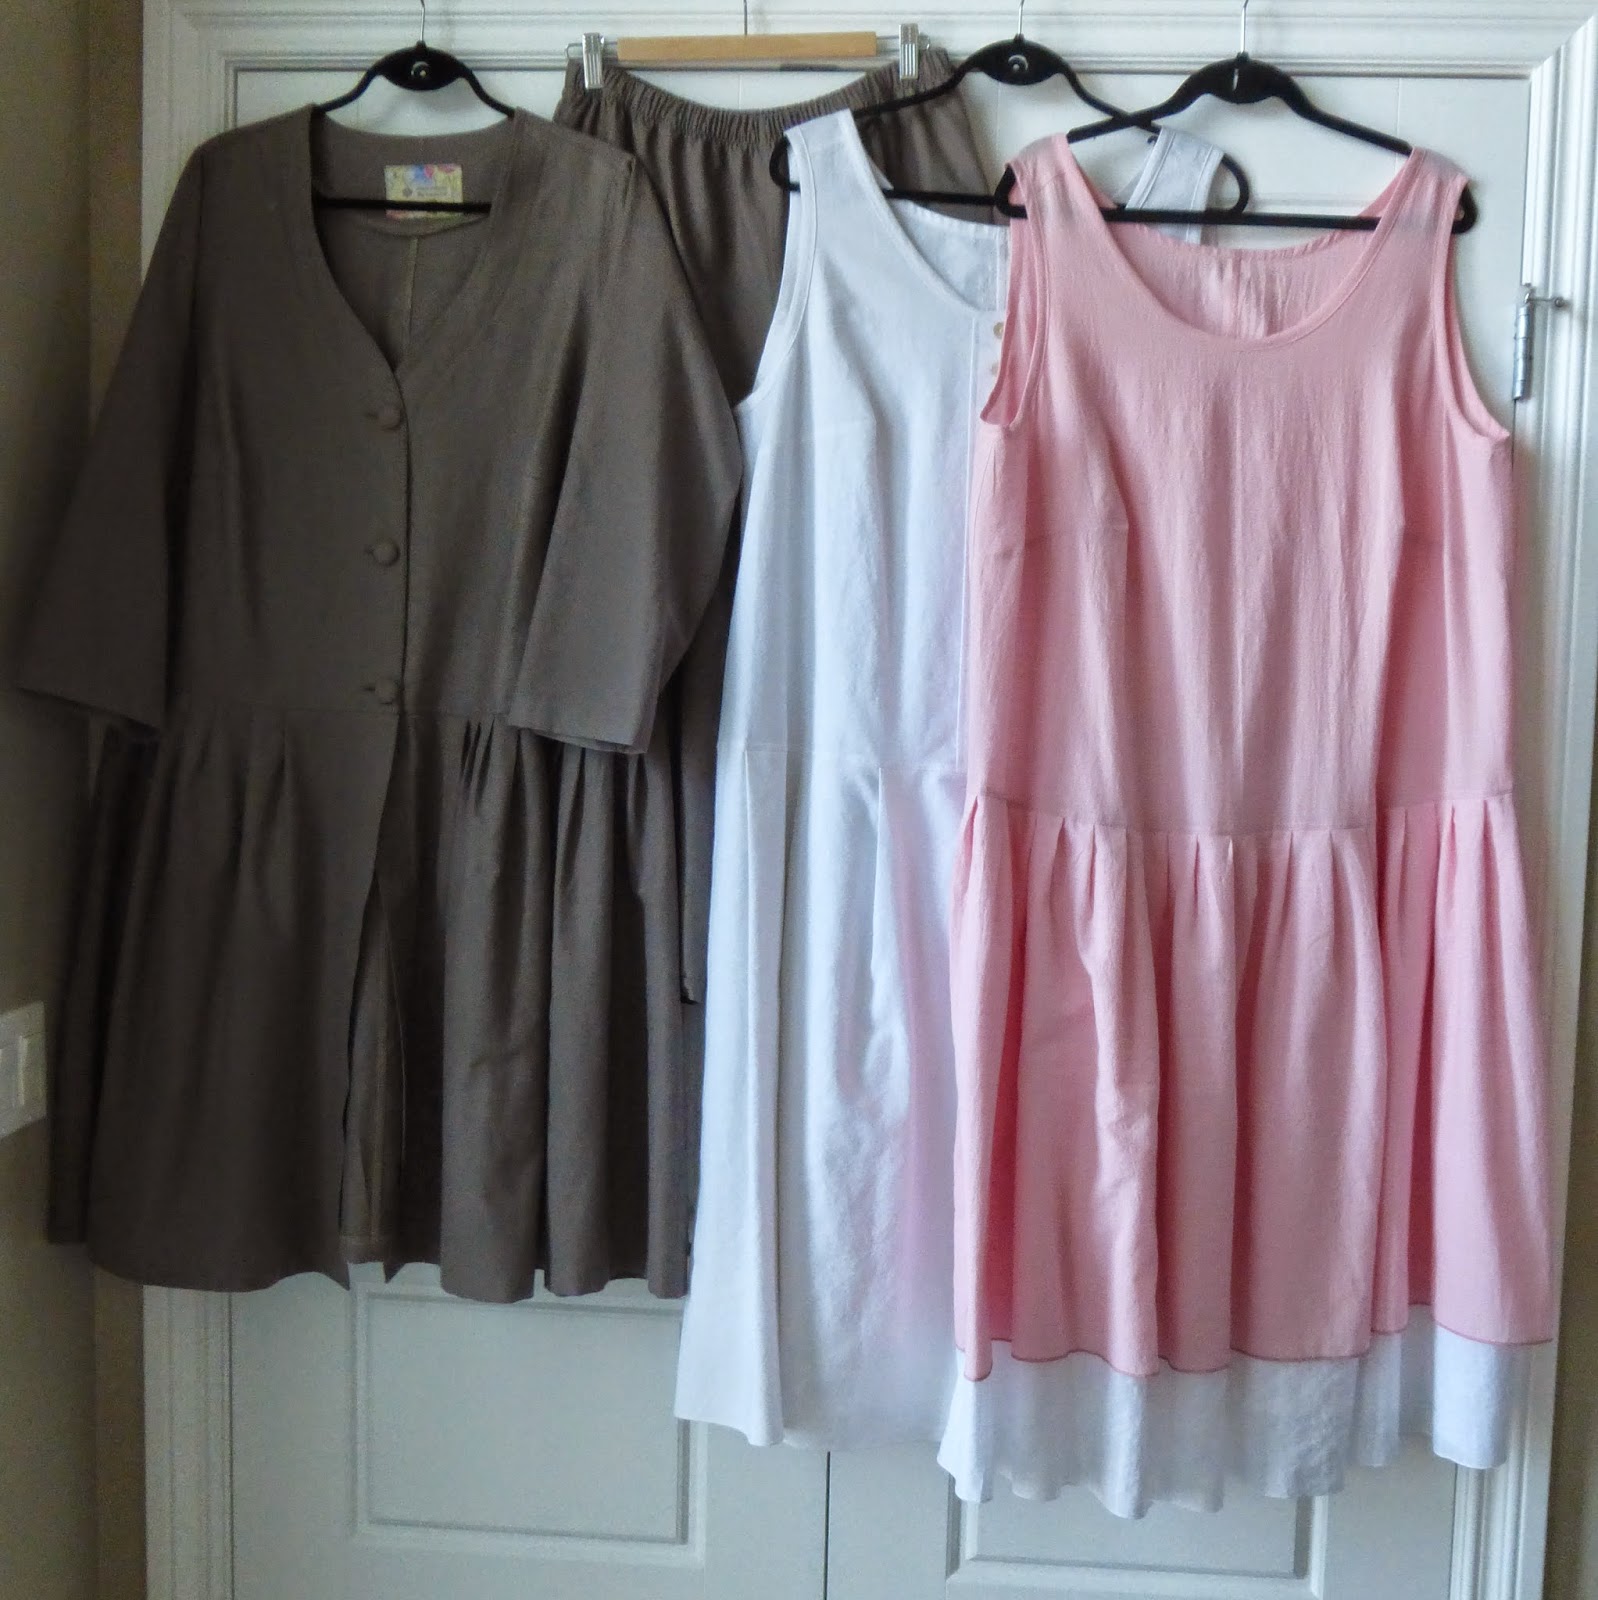
As I mentioned in previous posts, here, here and here, I wanted to try something very different, and I used patterns from a designer called Tina Givens.  She has her own couture line here, and she certainly has an unusual 1920's meets 'Out of Africa esthetic.

This is what my final collection looks like:


Before editing.  I actually made more clothes than I needed.  Just in case!  Unfortunately, the pair of patterned trousers did not make the final cut as not all my tops worked with them.  Nonetheless, I think that they are great, and they will be worn.  Lots!

Here are my finished 11 - five tops, three bottoms, two dresses (that can be worn on their own or doubled up as tunics) and a duster coat/tunic.


Here are the individual garments:


And a few close up photos:


And I was also intrigued to see how many 'looks' I could get out of these garments.  Would you care to take a look? (the answer is after the collection of photos):


5 tops x 1 pair trousers (#1) + 1 duster = 10


5 tops x 1 pair trousers (#2) + 1 duster = 10


5 tops x 1 pair trousers (#3) + 1 duster = 10


2 dresses on their own + with/without the duster + with the trousers (#1) = 8


2 dresses + with the trousers (#2) + with/without the duster = 4


2 dresses + with the trousers (#3) + with/without the duster = 4

For a grand total of 46 looks! Well, that's 'Me Made May' sorted!!  And on the subject of numbers, Tina Givens actually sells her Couture Collection, and I priced up some of the items that I had made.  For my costs I did not pay more that $8/m, the trousers took 2m and the slips/dresses/jacket 3m:

Trousers x 3 = 3 x $270 = $810.  My Costs 3 x $16 = $48
Slips x 5 = 5 x $279 = $1395.  My Costs 5 x $24 = $120
Dresses x 2 = 2 x $349 = $698.  My Costs 2 x $24 = $48
Jacket/Tunic x 1 = 1 x $308.  My Costs 1 x $24 = $24

Now, it would be fair to throw in some thread, buttons, elastic, 3 x TG Sewing Patterns etc - let's say $50.  I am not going to price out my time as I sew as a hobby - this is my entertainment.  So let's look at the totals:

TG Couture = $3201 or $291 per item
Spotty Dog Social Club = $290 or $26 per item

Interesting.  My costs are just less than 10% of the designer originals.  The Couture items are actually sold in a shop in Calgary - I'll have to wear some of my collection and then go and stalk the shop!  Do you cost out your clothes?  Do you think that it is fair to compare with the Couture originals?

Meanwhile, back with the SWAP . . . . . I checked the dates on Artisan's Square (who run the SWAP) and I posted on February 24th that I intended on taking part - so about 8 weeks to make these garments.  Not bad really - the joys of using simple but fun patterns!


I'm just waiting to see what the instructions are for submitting photos etc - I have dozens more photos, and will attempt to load them to Flickr, for you to see.  I've no idea if that link will work - I don't use Flickr very often!

Finally, I wanted to upload just one more photo - after all, Alberta is cowboy country!


Wednesday, April 29, 2015

Seeing Spots - AKA the Dalmatian Bra!

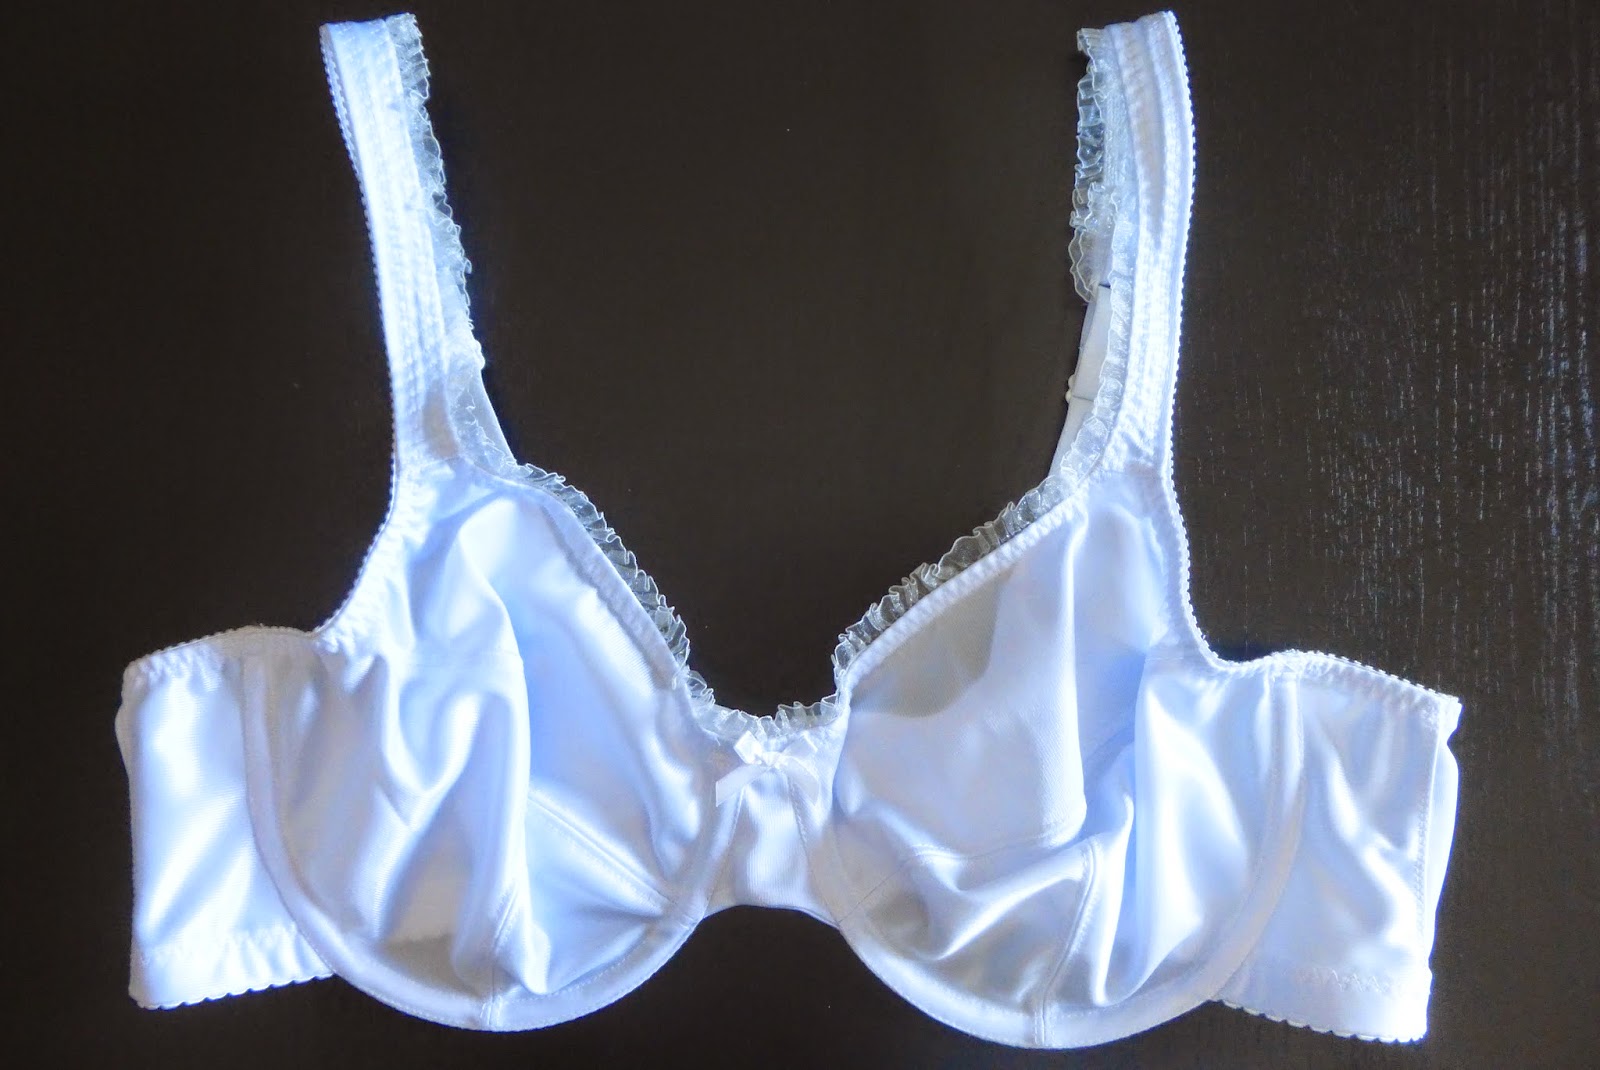
I really love the Pin Up Girls 'Linda Bra' with a partial band, and posted some photos here and here of the first ones that I made.  I enjoyed layering the fabric and applying a spotty lace over the simplex, so I ordered some more in black (scroll down the page to the 'dotty black mesh).  And this is what I made:


The base fabric is white simplex from Bra Makers Supply,  I used a pack of black findings for the elastics, closures, rings etc., and black powernet for the back.


In order to make things harder on myself, I cut the base fabric and the netting/lace out separately, then used spray (fabric) adhesive to hold them together - guess how much of a mess I got into.  Go on, guess!!!  In retrospect, it would have been easier to have cut a piece of each of the fabrics to the approximate size that I would need, adhere them together and then cut out.  The fabrics would probably still need some pinning/stitching to make them work as one piece - but that would have been easier.  Sigh!


And that's is really.  I cut the higher back from the power net as you can see here, it really does help to prevent the straps falling off my sloping shoulders.

I have some red and some turquoise simplex and findings kits, so I think that I may play around with the lace and see what I can come up with.. . . .

Monday, April 27, 2015

More Tina Givens - The Phoebe Top and Trousers and a Touch of Jaqueline

I've made the Phoebe trousers a few times already, but hadn't made the top that goes with these trousers.  Here is the pattern from the Tina Givens website:


Actually, I'm kind of lying a bit.  I have made the top out of white rayon (under layer) and blue patterned cotton (upper layer), but I cut the blue too short and the proportions were not very flattering, and the combination of fabrics looked like an apron that my grandmothers would have worn, so I did not complete it.  Nonetheless, I wanted to give it a go - and I made it as part of the garments I was sewing for the 2015 Artisans Square SWAP:


As you can see, I only made the one layer and chose the longer inner layer.  I changed the sleeves up a little and made cap sleeves, and made the same changes that I would ordinarily make - sloping shoulders, dartless FBA. I also put a seam in the back to save a little on fabric and to break up the expanses of fabric.  I used my serger to make a rolled hem, and shaped the neckline a little to make it more 'v' neck.  I made a small facing that I attached iron-on interfacing to support the neckline, and sewed it down with some top-stitching to keep it from rolling to the right side.


It is a cute top that looks great in these photos - once the volume has been tamed.  There is a lot of fabric in this top, and when I make it next, I will take out some of the volume.  What I do like - and this is rather strange, is the side seams that are curved to give tulip shape.


One of my cottons cardis (Simplicity 2154), co-ordinates very nicely with this top - and the Phoebe trousers - I'm just not sure if I would be better off with a cardi with a shaped hem, rather than a straight, horizontal one.  I need to think about that!


The fabric is a white linen - the same line that I used for the trousers (above and below), and another 'Jaqueline' top (below) that I made with a cute lace patch on the front:


Here is a close up:


This is my 'Ruth' of Core Couture pose.  She often stands side on/quarter turn and always looks fab!

Nothing new about this slip or the co-ordinating trousers - But I love them!

And what about the 'props'?  The chair with a bag and a cowboy hat?  I was taking (dozens) of photos that show all the items that I had made for the SWAP that I have titled 'Out of Alberta' so I had to throw in a cowboy hat!  I'm nothing if not subtle!

Sunday, April 19, 2015

iPad Stand and a Couple of Bras

I love to read other crafty blogs - sewing,  knitting, crochet, quilting etc., and pick up on their ideas.  This morning I read Sotak's blog, and she had a post about making tablet holders.  She herself had seen them on Pinterest, here.  Well, who doesn't need a handy holder for their tablet?  So this is what I made whilst watching an episode of NCIS this morning:


They are made out of a rectangle of fabric, sewn and twisted and stuffed with rice and regular stuffing.


How fab is that?!  They really are very useful so I made one for Mr. SDSC and one for my father.  Oh, and then I decided I need another in my sewing room because it is such a drag to have to carry one from one room to another (I don't have a photo of that one, but it is just as cute!) . . . . they are very quick to make - less that a half hour.  Due to the rice, they are quite stable - I have mine balanced on the arm of my chair right now.  The only change that I made to the instructions, was the same as Sotaks, and I ironed some fusible interfacing to the fabric.  It has a bit of loft to it - 1/16" max, and I iron it onto the little bags that I make.  It made the project feel smooth and soft.


I think that they would work well with other types of tablets/book readers, and maybe even small books.


I also made a couple more partial band bras, but the photos are a little a washed out:


It was pretty straightforward, overlaying some textured, dotty lace on the upper cup and the bridge.  It went together quickly and easily and has already been 'tested'!

I then saw this whilst walking past La Senza yesterday:


What I liked was the plain cup with the lace on the bridge and the sides/back.  So I made one!


I'm really pleased with this.  I used fabric spray to attach the lace to the base fabric - I did this on the pink bra above as well, and it was more successful with that bra - on this one it pealed away, but held enough for me to sew it all together.  The only problem is - I was a little aggressive with the bottom band elastic and it bordering on 'uncomfortably snug'.  I will wear this on my 'skinny' days!  I am going to play with some foam cups next - ones that I make myself and then cover with fabric.  I've been watching some great videos on Make Bra - lots of great ideas!

I also have some more linen, and have some TG garments in mind - I may be swapping out a garment or two from my current TG collections for the Artisan's Square SWAP - I've got over a week left, so loads of time!

How was your sewing this week?

Sunday, April 12, 2015

Back to Basics

I have to say that I had a great time with my TG sewing, and when I finished the pieces that I had in mind, I was at a bit of a loss as to what to sew next.  It is almost like coming down off an adrenalin rush, well not really, but there is definitely some kind feeling of loss.

So, what to sew next?  Well, my 'go to' project when I am feeling a little down, or need to sew but don't have anything planned, it to make something small like a mug-rug, or a pouch.  The thing is, I am planing on attending another bra making course in Hamilton later in the year with the lovely Beverly of Bra Makers Supplies, and I had picked up a half yard of 'bra' quilting fabric.  So I made a pouch!


The lining is made from some Ikea pillowcases - we buy the cheap duvets and covers for our greyhounds to lie on.  When they need laundering it is a lot easier that washing a regular dog bed of the size that would be suitable for greyhounds - they are big dogs! The pillowcases are always unused, but the print worked really well with this pouch as a lining.

Having made a lovely pouch that I will use to hold some sewing notions on my bra-making trip, I thought I'd make a bra.  Just like that!  I recently bought the Craftsy Class, Sewing Bras, Designer Techniques by Beverly Johnson.  This course is a follow on from the basic bra making course, Sewing Bras, Construction and Fit.  There were a couple of details that I was particularly interested in, the first was sewing a bra with a partial band.  In other words, the band does not go under the cups.  Secondly, Beverly shows you how to change the back band to help prevent bra straps falling down.  I have sloping shoulders (I guess we probably all have) and this seemed an ideal opportunity to try it out.

I used my Classic Bra pattern from Beverly's Pin Up line - I have made this many times before and it is very comfortable, and then followed the Craftsy Class to make the necessary alterations.  You could purchase the pattern complete, without have to made the changes, and it is called the Linda Bra.  However, the pattern is $20 plus P&P, and the Craftsy course is currently on sale for $24.99, so it makes sense to get the course if you already have a fitted Classic Bra pattern.  The construction is pretty straightforward, although there were a few changes in comparison to the Classic Bra, but it went together well:


I will wear this tomorrow and give it a good 'try out'!  It seems a little too big around my rib cage so I have trimmed 1/2" of the back band on the pattern.  I will need to wear this bra on the middle hook and eye setting, so I think it will be OK.  I also noted that the bridge does not sit flat on my chest, so I'll have to look into that.  It is not out by much, so a small adjustment is probably all that is needed.  Other than that, all seems good.  I like the feel of there being no band under the cups, so once I have these two little issues sorted out, I will start making some fancy smanchy versions!  As I have made the back band higher to help prevent the strap slippage, there is not much space for strap adjustment.  I used the elastic that comes with one of Beverly's findings kits, but that only gives you a maximum of 10" per strap.  I will either have to buy it by the metre in future, or see if she would add 2-3" more in a pack.  I think that would do the job!

Again, I can't recommend Beverly's patterns and classes enough - I think that they are great!

So, that was my weekend sewing - how was yours?

Friday, April 10, 2015

Out of Alberta - the Details

I am a 'multiples maker' - in other words, when I get a pattern all worked out I like to make it again, and again, and again.  So it was no surprise that it should happen when working on my Tina Givens Collection for the Artisans Square 2015 SWAP (sewing with a plan) as you can see from my last post!

I had a lot of fun with details, and wanted to talk more about them, and the actual patterns.  The instructions that come with TG patterns, are quite different than the instructions that you would get with the Big 4.  Two pages, letter/A4 sized, a few pictures and some written instructions.  They are adequate, but there may be some head scratching if you are new to this sewing game.  But fear not - there is always Google!  So what did I do and what did I change?  I rather liked the cute patchwork detail - but not your Grannies patchwork - where random fabric scraps are added to your garments:


In comparison to the details on TG clothes, this is ultra conservative, but for me this is wildly way out there!!  As the clothes get washed then the edges will ruffle and fray a bit more adding character.

As you can also see from these pics, I have also top and edge-stitched pretty much all the seams.  I like the strength it adds as well as a kind of utilitarian tidiness.

Next up was the neckline and arm opening.  I started using my usual smart finish - no raw edges, like this:


I used to find that binding made the edges gap outwards, and so I changed the way I attached the binding and this is what works for me.  I cut my own binding using a rotary cutter at 1.25" wide.  I then feed it through my bias binder making thingy and I find that the extra 1/4" means that the binding meets nicely in the centre.  I sew the binding to the top from the inside (so the right side of the binding is sewn to the wrong side arm/neckline, stretching the binding a little as I sew it on.  I then flip it ALL to the right side of the garment and sew it down using a edge foot that keeps my stitching nice and tidy.

Miss TG applies her binding like this:


So I tried it too!  Same width binding, folded in half and pressed, then sewed it to the raw edges from the right side - top and edge-stitching (do you see the pattern?  I will try the raw edge finishes but don't take away my top stitching!)  As the garment gets washed, the bindings will fray and ruffle.  I am hoping that I did not sew too close to the edge and that the binding will stay put!

Another detail I utilized was adding a few buttons to my Kika dress:


You may recognize this finish and you get top marks if you recognized it from Colette's Sorbetto as seen here.

I know a lot of people would shy away from this kind of design due to the thin fabrics, wide and uneven hems.  If you have a serger, the chances are that you can do a rolled hem like I did:


Just how quick and easy is that?  I rolled the hems on the pieces before serging the side seams so that I did not need to 'roll' over a seam.  I think that the finish looks pretty good.  And yes, I have to match my serger thread!!

So there you have it - a few details that would have mde the previous post waaaaay too long!  I hope that there was something there that you found useful.  What are your favorite details that you use with your sewing?  Do tell!!