I have trialled a couple of pairs now, and have made a decision. Basically, I am a rectangle in shape with little difference between my waist and hips. I therefore do not have much gathering going on if I put elastic in a waist. I also tend to wear cardigans or sweaters that cover my waist area rather than tucking in a shirt or top. Therefore I plan to use fabric with a bit of stretch/lycra to make the fitted trousers (waistband, zip, fly etc), and woven fabrics to make the slightly looser fitting trousers with an elasticated waist. I would probably do some top stitching to show a faux fly on the elasticated versions as well as adding some pockets. Hmmmm. Lots of food for thought!
Moving on . . . . . whilst I don't want to bore you too much, but there were a few changes that I made to the trousers pattern that may be of interest to you . . . .
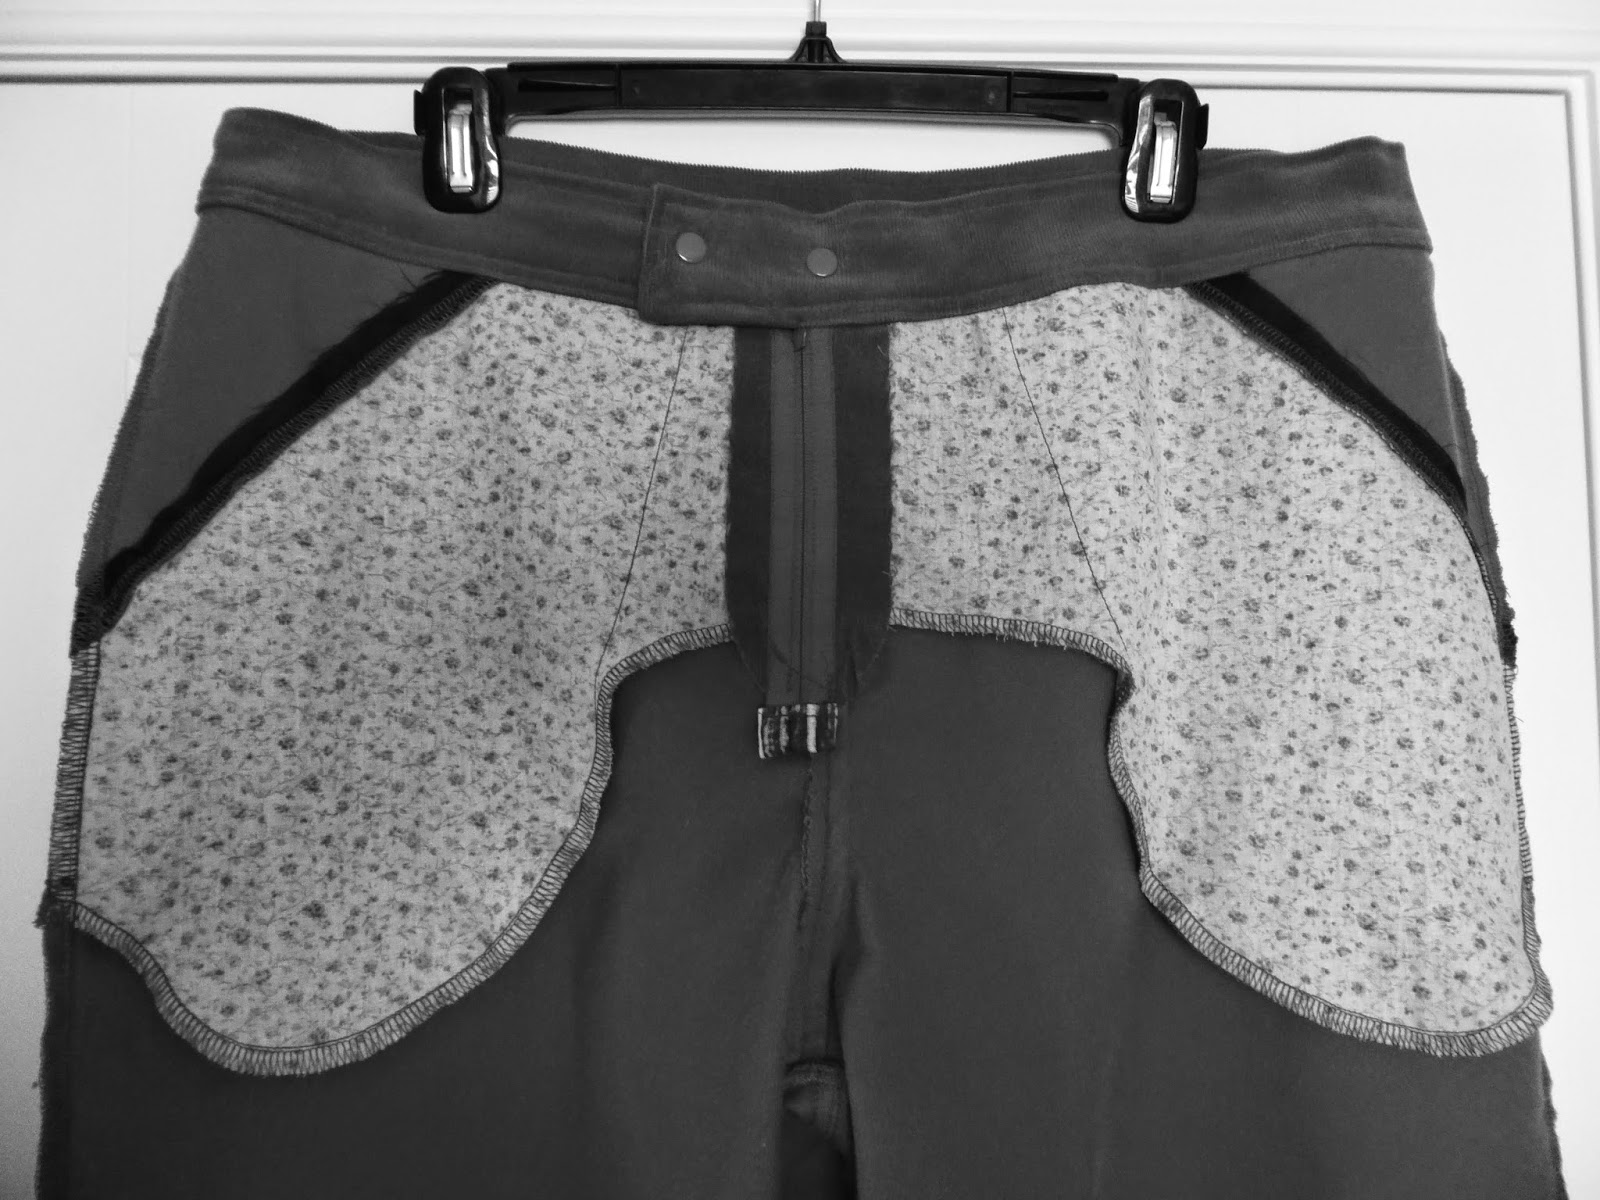
Firstly, I extended the pockets so that they would be caught in the fly seams, thereby creating a 'powerband' that helps to keep the front of the pants stable. The photo below shows a standard front pocket bag on the right, and my enlarged (I like big pockets!) and extended front pocket bag on the left. The other part of the pocket bag does not need to be extended, just this part that forms part of the front of the trousers and is caught in the side seams.

Secondly, because the zipper is placed as far over as it can be behind the fly, I didn't need to match the zipper tape to the fabric . . . which was just as well as only had bright coloured zips in my stash!


The above two photos also highlight the two different waistband treatments that I tried out. For the grey trousers I attached the waistband and threaded through some 1" elastic as per Pants for Real People by Palmer/Pletsch. When I am wearing the trousers you cannot see that there is any elastic there - they just fit a bit nicer around my waist. The black pair have just a straight waistband with some interfacing. I will see which ones are the most comfortable, and use that in the future. Oh, and can you see the lovely poppy fabric that I used for the pockets? I think that may become my signature - lovely fabrics for the pockets. Another great way to use up the cute fat quarters that I keep finding . . . .

Finally, I did try button holes, but got a little impatient - all that measuring, sewing, blah, blah, blah, so I used some cute snaps that I have about 300 of! They are from a company called Babyville and were designed for baby clothes and nappies. I have used them before when making wallets, and I love them. They are plastic, come in lots of colours (except black!) and are fixed with a dandy instrument that looks a bit like a hand-held hole punch. As long as your waistband is not too thick, they snap on really well and are very strong. I have tried the more traditional snaps that hammer on, but I have never found them to be very effective - I find it hard to get them straight and matching, and if you hammer too hard the snaps actually cut through the fabric. So, Babyville snaps it is for me for now. I have no intention of flashing my waistband - I usually wear a top over my waistband, so no-one else know but myself!

I forgot to mention in my last post that finally, now that winter is almost upon us, we have a deck and railings and I can take photos outside. I though it would be fun to share a quick photo of the set up - my camera precariously balanced on an iron table and my two helpers checking things out!


Thanks boys you were great!
Nice finishing ideas.
ReplyDeletePockets are essential so they might as well be pretty. Your snaps are cute. I'm not fond of doing buttonholes either.
ReplyDeleteAww your dogs are sooo gorgeous.
ReplyDeleteSorry published that too soon...hope they are careful around your tripod! Your style of pockets is a good idea, I like it and why not use elastic for a perfect fit? On my hourglass figure it would bunch up, but I can see the point for a not only comfortable, but perfectly fitted waistband.
ReplyDeleteThank you for showing how to do the pockets. It reminded me that Ron showed us how to do it when I went to his first class. I love those Babyville snaps also and will have to use them in the waistband also. Your pants are looking great.
ReplyDeleteI was just planning on looking up how to extend the pockets to the front fly, and there was your post. How timely. Thank you.
ReplyDeleteI love the brightly coloured fabric in the pockets. I've been doing that as well since it is so much fun.
Great job on the pants.. Love the colorful pockets
ReplyDelete