Wednesday, March 11, 2015

TG - 1, 2, 3

So far, so good - I've made three pieces for my Lagenlook/Tina Givens SWAP.  And I am really please with how the pieces have turned out so far.  Unfortunately I've not had chance to model the pieces myself - so 'hangar shots' will have to suffice.

OK, here we go!  First of all we have Jaqueline, and this is the photo from the website:


All these garments are from woven fabric, and I have made a pair of the trousers and two of the slips.  The first was in a white rayon and drapes beautifully.  Gosh, my photos look rather drab in comparison - I will need to learn to photograph like she does!


As you can see - pretty plain, nothing really to report.  I used my serger to complete a rolled hem and bound the neckline and armholes.  Those armholes are HUGE!  It is a good job that I will be layering this top as it verges on the indecent as far as the armholes are concerned!  I had to add two little darts to take in some of the excess fabric around the armhole - you can probably just see one in the photo above.


I sewed a small linen bias square on the centre back which will fray when washed - a little bit of whimsy!  And if I don't like it . . . . I'll just unpick it!

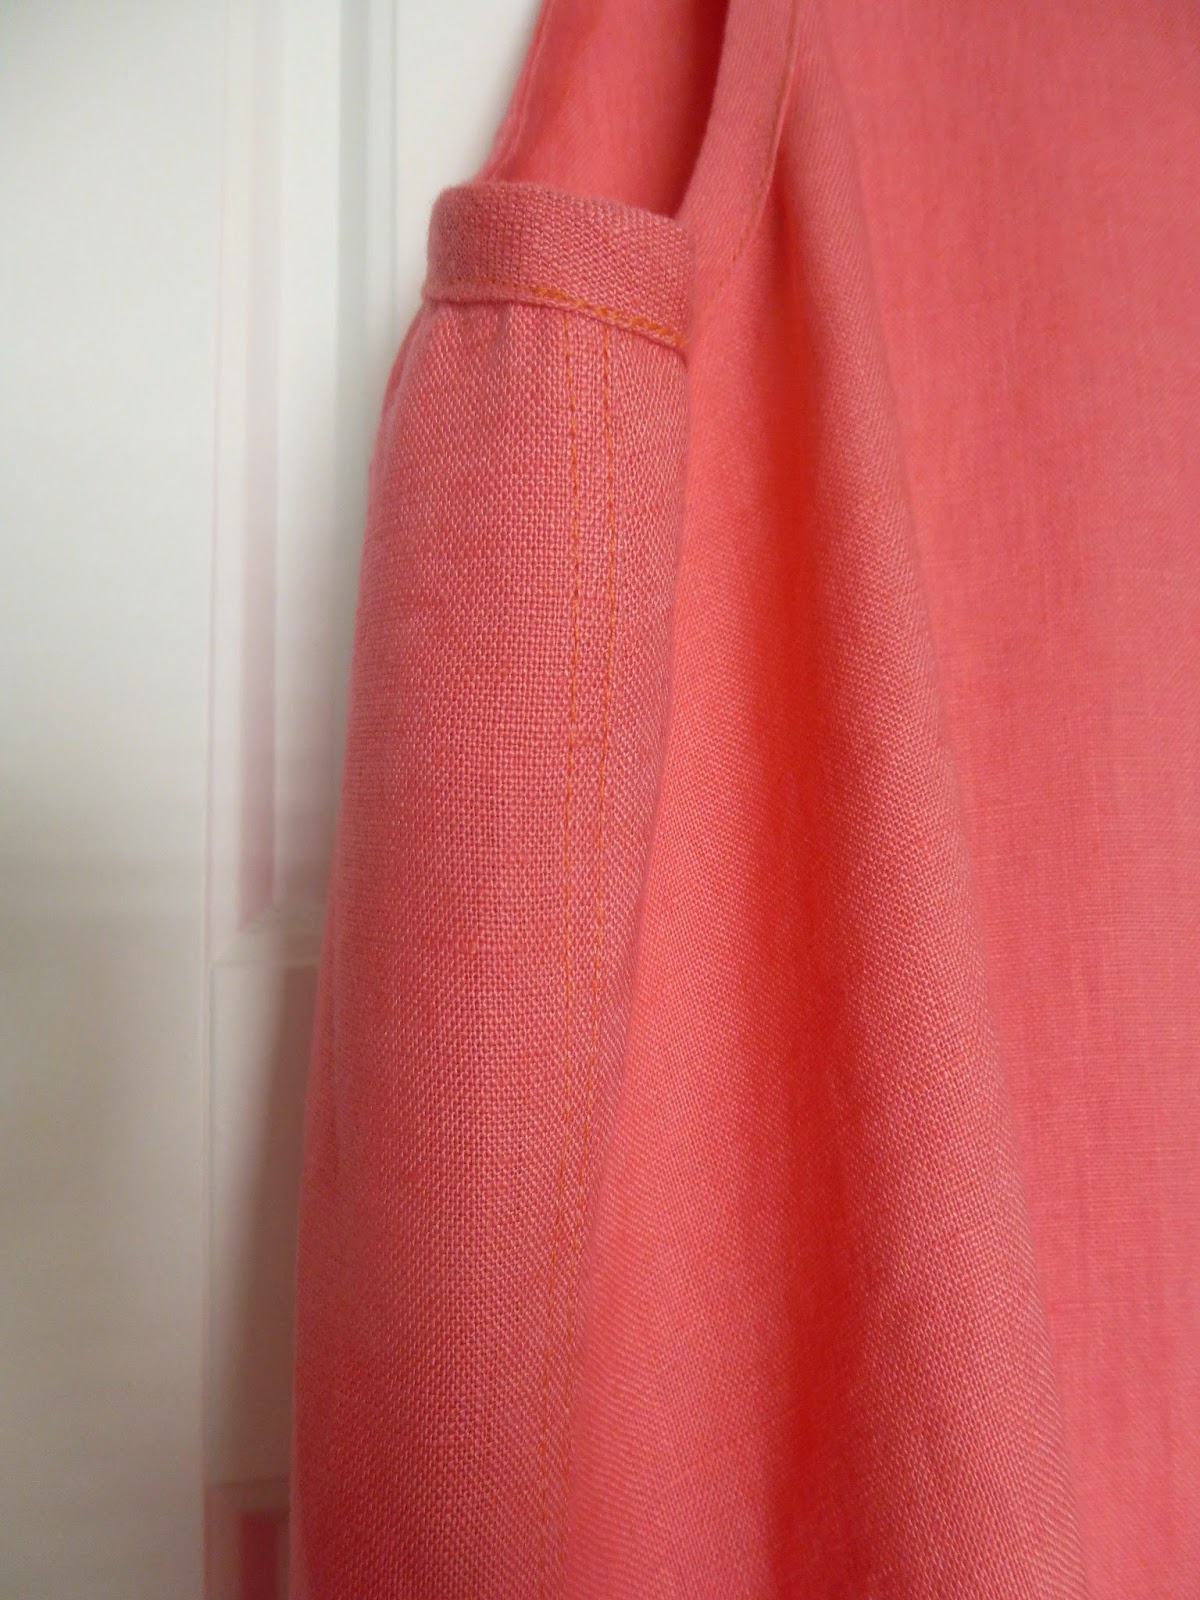
I then made another slip - after all, when I have been known to make just one iteration of a pattern?!  This time I used a gorgeous coral coloured linen.  I made a number of changes to the armhole and neckline (no armhole darts this time!) - I actually used my Sorbetto pattern which I had fitted many moons ago.  I did not include the bust dart or the centre pleat, and the fit is fabulous.  Really!


I have quite sloped shoulders, and as all the best sewing/fitting teachers will tell you - get the shoulders right and everything else will fall in place.  Well mostly.  But you get my drift!

And lastly - some trousers.  Ms. Givens appears to favour dropped crotch trousers, and I am not quite ready to embrace that as yet, so I used my TNT trousers pattern.  That dealt with the waist/crotch and I used the Jaqueline leg pattern for the pleats, binding etc.  I did shorten them a few inches so that they sit mid calf, rather than the designer ankle length, but will probably make a longer pair next time.  I used some tan ramie for these, and I am pleased with these as well.


I know, I know, hanger shots are not that inspiring, but I wanted to have a complete 'outfit' before taking 'person' shots, but also wanted to record my progress!  Next up with be the cropped top which is likely going to be based upon the jersey cardis that I have been making recently - Simplicity 2154.  I will shorten the top and then add a frill/peplum to get the 'feel' of the TG pattern.

I have to say that I am loving these garments.  They are pretty quick and easy to make, they fit well (when I sandwich them with my TNT's for shoulders, crotch curves etc) and the fabrics are gorgeous.

The next pattern on my list is the Phoebe:


Closely followed by the Peplone:


And the Briare, which incidentally is a freebee pattern!


I am having to be very careful with fabrics - I don't want to look like someone from Little House on the Prairie, so I have a lot of plain fabrics planned so far, and have swapped out a couple of the patterned fabrics I had as I think that they will look a bit too cutesy . . . . but that means I can use some of my more brighter and bolder fabrics.  Watch this space!

A word or two on these patterns, there is not much in the way of line art.  if you are interested, it is worth downloading the instructions (from the website, and free of charge) to get an idea of pattern pieces and style lines.  I think that they are are great starting point if you have some TNT's that will assist you with fit, like I have done.

Finally, I was pleased to see that Beverly Johnson, the Fairy Bra Mother, has a new Craftsy class - Sewing Bras Designer Techniques.  I managed to pick up my class for half price, and will be making some designer bras over the next few weeks.  Details to follow!

I think that I am getting a handle on my Spring sewing, and the SWAP - are you sewing into the new season?

Sunday, March 8, 2015

Thinking Lagen Look

I am sure that you have all heard of Lagen Look - a style of layering clothes, quite often involving layers of trousers, dresses and tops, asymmetric or hankerchief hems, loose fitting garments that work together and with others - a kind of smart/casual look.  Now I am not at all an expert on this style, but there is something about it that rather intrigues me. I couldn't quite put my finger on it until I realised that some of the clothes that I wear, and enjoy wearing actually fall into this area.


These are some of my favourite work combinations -  and will be a great starting point for my next adventure (and as an aside, I rather like the slightly longer hair . . . . ).  Now I want to move more towards the casual look - shorter jackets with longer shirts/dresses, cropped trousers, Oooh!  I can't wait!

I have been prompted to investigate this look/style further as I will be working from home more often from now on.  Although I get to dress quite casually at work - jeans is the norm for most of my colleagues, I do like to dress more smartly - I've got to wear my lovely clothes somewhere!  However, I now have the opportunity of doing my job from home, so will be spending more days in my home office and as much as I like my PJ's, I was looking for something that was just as comfy but still work appropriate.  Sort of!

Now there are quite a few mainstream patterns that I think would give me this aesthetic such as these:


Source: Vogue 8793


And these lovely patterns that were gifted to me from the lovely GMarie - thank-you so much!  So many patterns . . . . . !  I think that she knows me better than do myself!

I downloaded a few patterns designed by Tina Givens, in particular the Jaqueline suit and the Phoebe top and trousers.  So I am busy cutting and taping right now - these pattern pieces are HUGE in comparison to the jeans and cropped cardis that I have been making of late (I think that the shorter cardis will look great with a longer top hanging under).  I've also sorted out some fabrics to play with:


There is a lovely mix of cotton, linen, ramie and bamboo.  Oooh, purdy!

Well, I am off to play now - I should have some photos by the end of the weekend . . . . . but in the meantime, how well do your sewn clothes match your life?

Saturday, February 21, 2015

Fit for a Queen

The lovely Mrs Mole who blogs about the brides who come to visit her, over at Fit for a Queen, has recently featured my disaster with McCalls 6844, a pattern that seems to universally popular . . . . except with me.  She has a 'Sew Bad Saturday' feature - which she describes as:

'let the pattern makers see what happens when real people with real bodies try to re-create their visions on the front of the envelope. Get helpful comments and suggestions from other sewers thinking about venturing into purchasing your pattern choice…in other words…save them the trouble!'

Do take a look - it may save you some time and money!!  And if you have something to contribute - let her know, we are all in this together after all!

In the meantime, I've been making some more cute pouches that are being auctioned to raise money for Galgos del Sol:


I hope that they raise lots of money!

Wednesday, February 18, 2015

Late to the Party - Simplicity 2154 with a side of Ginger

If truth be told, I am not one of the cool cats, that jumps on a new pattern as soon as it is published, makes it up without delay, and then posts fabulous photos online to make everyone else drool over it with envy and longing.  In fact, I fall into the 'envy and longing' hanger on category and on a number of occasions, by the time I come to buy the pattern it is fast on it's way to becoming OOP.  Such was the case with Simplicity 2154, a retro suit pattern.  It was the cardi that I was interested in - I love cardies, and have made one or two in my time, so this last weekend I thought that I would have a play, using up some leftover lengths of fabric.

I give you pink:


And lilac:


And stripes (Oooh!  Looking a bit grumpy here - and this was the best pic out of the batch!):


And to finish off, a bright cheery one!  You may recognise the fabric from another cardi that I made a few weeks ago.


So, what can I tell you about this pattern?  I love it.  The only changes I made was to chop 2" off the length, and one inch off the shoulder length.  Other than that - this was a 'straight out the packet' sew for me.  I will probably play around with the sleeve and draft up another, slimmer fitting one that comes down to my wrist - this one is designed to be cropped a little higher.

The pattern comes together very easily - unfortunately I managed to loose the instructions, so I made it up in my own way.   The only issue was with the front facing - I had to search around a little to work out how to attach it and I am really pleased with the results.  All the seams are overlocked/serged, and then most of them are top-stitched in place.  I did have some fun with the facings and used some pretty ribbons:


Most are 7/8" or 1" with the exception of the blue ribbon which is 1.5" wide.  The cream facing is the only grosgrain - and I did wash them all first, so that there won't be any 'shrinking' surprises! I also used snaps on these cardis - The thought of so many teeny tiny buttonholes did not fill me with joy and happiness.  I am happy with my decision - the snaps work well with the casual vibe of these cardis.  Aaaaaaand, there are another four in the wings - just waiting for some more snaps to arrive to finish them off!  My Pattern Review can be found here.

Why yes, thanks for noticing, I am wearing more jeans in these photos!  I now have the blue stripes that I mentioned in the last post (see the pink cardi above), some plain black ones (patterned cardi above) with black top stitching, and some thinner blue/black jeans with purple topstitching (lilac cardi).  Here are a couple of close up that show the stitching and the gorgeous co-ordinated pockets, zips and waistbands.  First are the blue/black denim with purple stitching:


And here are the black ones - not sure what happened with the zip colour when I took the photo, but it does match, honest!


This last pic shows that I add a small piece of leather to act as a washer in between the waistband and the pin that gets hammered into the jeans button.  I use a small punch to make the hole in the fabric, and was concerned that the (cough, cough) stress on the waistband might pull the pin out, and this small piece of leather (cut from a bag of offcuts I picked up somewhere, very cheaply!) works perfectly!


So, what is next?  Well, I think that I need some lightweight tops to wear with my jeans, and under a cardi - they would be perfect for layering, and also on their own when (if) Spring arrives.  I have seen quite a few versions of the Gibson blouse, and the Sutton top, and have both of them downloaded and printed!  I also picked up some of this gorgeous fabric which will almost certainly end up as small pouch bags (like I used for the Princess and the Pea)!


How is you sewing coming along?  What plans are you working on?

Wednesday, February 11, 2015

Jeans Waistband - My Upsidedown Method!

I just wanted to share how I constructed the waistband on my recent Ginger jeans.  It is probably a standard method - but I like to think that it is something that I dreamed up myself and that it is a totally new!  In any case - here is what I did!

The outer waistband piece (which I have interfaced here) is attached in the usual manner, right sides together along the waist.  Incidentally, one of things that I learned during one of my sewing classes is that you should fit your waistband to your body - then attach it to your trousers, stretching it if needed.  I find that this works especially well with the jeans and gives a nice snug fit.  It probably does not make too much difference to those of you who have lovely hour-glass or pear shaped bodies, but for those of us that are cylinders, a bit of cinching in at the waist works wonders and stops my jeans falling down!


As you have probably noticed with these jeans,  I did not add a fly shield, so I need to extend the waist band a little to attach the button.

Next up, sew the facing of the waistband along the same sewing line where you attached the outer waistband.

Square off the edges, and trim/grade the seams if required.   I run my serger along the waist seam.  It tidies it up and leaves a nice even seam allowance.


The next job is to press the waistband (outer and facing) up.  Now look at that lovely tidy seam you have where your waistband attaches to your jeans!


Now you need to get your 'ironing-on'!  I marked the top edge of the outer waistband with 1/2" chalk line and pressed it down.  The facing is then pressed down to match - the top two edges need to match exactly but you can maneuver the facing as you sew along.


On the photo below you can see that the pressing looks mismatched where I moved the jeans for the photos, but you get the idea.


Look how flat and level it all looks!


All you need to do now is your edge and top stitching.  I do this from the right side and for these jeans I edge-stitched with a contrast thread about 2mm from the edge - this closes up the top waistband edge.  I then edge-stitched with matching thread using my 1/4" foot.  Below you can see how tidy this looks from the inside as well.


Add the button and buttonhole and you are good to go!


How about you - what tricks do you have to make your garments look better than the rest?!

Sunday, February 1, 2015

Jean Jeanie

It was bound to happen.  I just can't make something once . . . . and my jeans pattern is now a firm TNT!

But let me take you back a few steps.  I made a pair of Ginger Jeans a week or so ago, and although I loved all the top-stitching and the actual 'putting together' of the jeans, there were a few fit problems.  Well, one major one really - the 'ole saggy butt'.  I do not have a pert tush to fill out jeans, and toddled off to my fabulous sewing teacher Janice for some advice.  There was the option of taking a huge horizontal pleat just under my butt, then dealing with all the other required alterations, or using my trousers TNT and moving on from there, so McCalls 5239, come on down!  I have used this pattern many times to make pull on, lined work trousers.  It fits well (thanks to Janice's fabulous pattern alterations) so what a great place to start.  It should be added that I tissue fitted the Ginger Jeans, and I could immediately see the problem - the pattern is clearly designed for a more hippy sistah with a well defined hip and waist.  Unlike myself with a more 'cylinder with dents' figure.


I used the Ginger pattern for the pockets, fly, yoke and general style, and my TNT for the rise and crotch.  My wearable muslin worked well - sorry, no pics as the fabric creases terribly and I have already worn them to work, so today I made up a pair (#3) in a dark navy denim.  This fabric is heavier than my first pair - and my machine can tell the difference - but they sewed up well.  I made a few changes (well, who wouldn't) and I am thrilled with his version.

Pockets - my wearable muslin had packet stays, and they were OK, but for pair #3 I used the Ginger pockets - I love how they are just one piece and fold over.  I did make three inches longer though - the original pattern piece is very small.


For topstiching I used regular thread in gold.  I think that it looks more subtle than the proper thread.  In fact I made a quick sample to test the differences:


I also changed the back pockets.  They were designed to have a straight side and a curved side, I redrew mine to be symmetrical and have two straight sides.


Waistband - I attached this in a totally different way.  I like to think that it is one that I have developed myself, but I suspect that it is a common way of doing it - just new to me!  My problem with waistbands is that I struggle to get a nice looking seam on the inside where the waistband and the trousers meet.  Like this:


So what I did with these was attach the outer denim waistband as usual, I then attached the waistband lining along the same seam.  Next was to sew the two short ends (right sides together).  I now have a raw edge for both the outer and the inner waistband along the top waist seam.  I pressed each piece down 1/2", and when I top and edge stitch, this raw edge was sewn closed.  I really like this finish and think it looks a lot smarter.


I do still have a problem with excess fabric in the upper thighs, and I will work on that.  I think it is getting better though.  This pic shows RTW cords, jeans #1, jeans #3:


It looks as though I will need to re-hem #3 as they were bunching up rather unattractively at the bottom, hence the 'turn ups' here!  I think I can do with taking out 1/2" horizontally from the yoke and it also looks as though I have one hip lower than the other.  But I think that has more to do with how I was standing.  I was kind of 'over' the photo session!

I also wanted to show you the guide that I use when sewing the fly.  When I took a class with Ron Collins last autumn, he recommended these guides, and I managed to pick them up on eBay really cheaply.  You can use them on the fabric and sew up against them, but I prefer to use them to chalk the sewing lines.  They come in different widths to accommodate various fly sizes.


And that has been it really.  I cut out another pair last night in a slightly lighter blue denim, and I now feel happy enough with the pattern to be able to sew these straight off the pattern (I do need to work on the pocket topstitching - have a signature design!), and I will be making some tops and cardis next weekend.  I feel that I am slowly getting a handle on my 'casual' wardrobe, and it feels good!

PS.  Still no outside photos - the weather had picked up nicely, then Friday night we had about 10" snow.  It looks lovely, but a pain to take photos in!

Sunday, January 18, 2015

Ginger Jeans

I made some jeans!


And I love them - despite them being a little on the large side!  I really need some casual clothes in my wardrobe - and this was the first attempt.  I used the Ginger Jeans by Closet Case.  There are two designs in the pattern - low rise with stovepipe legs, and high rise with skinny legs.  Of course, I wanted high rise with stovepipe.  And what the lady wants, the lady gets - at least when she is wielding the scissors!

I traced off size 18 as that seemed to fit my measurements the best, and I found that the pattern ran rather on the large side.  My hip and waist measurements are not vastly different so I took a slice off the hips at their widest part, probably about 1/2" at the two seams, and then took 3/4" seams down the sides.  Other than that, I made these up, without any other changes. 

Without any further ado - here are some close ups.  As you can see, there is some bagginess going on around the back, under my butt and the yoke needs altering too:


This is waistband pulled up a bit more - somewhat smoother!


I think if the bagginess is dealt with then the pockets will lie flatter.  Whilst I love the top stitching, the contrast is a bit much, so I will probably play around with other colours.

The front looks pretty much OK - I will use front stays in future (see below under 'cons') and that will help with a smoother tummy area.  And yes, your eyes are not deceiving you, there was a fault in the fabric that I could not avoid (I bought 2m of 45" fabric, so I don't think that I had a scrap bigger than 2" square!) and there is a line across the crotch.  I am hoping that once these get worn in and creased, the line won't show as much!


Incidentally, I used 8.5oz denim, although the fabric is not a twill.  The top stitching thread is Coats Jeans thread.  It worked OK with my machine, but when I added the belt loops it was pulled through to the wrong side of the fabric.  To overcome this, I added more tension to the thread by running it through my fingers (as it came off the reel before it is threaded through the various loops and tension) as it was being sewn - a bit odd, but it worked well.  Due to lack of fabric I lined the waistband with some stretch cotton poplin.  The waistband could probably use more structure, and I may try denim on the inside next time.

I used my Singer Featherweight with the Singer buttonholer, and went round three times.  That buttonhole ain't going nowhere!  The button itself was a two-piece button that is hammered on.  I think it makes the jeans look more professional.

I know that these look a bit 'Mom Jeans' but I would not wear these without a top covering the waist area, and they are just so comfortable, that I am not going to change.  But I am going to work on getting a better fit!  For a first pair, I used these for testing techniques and I am happy I did.


Pros

  • I really like the look of these - they look like RTW. Can't wait to try out a patterned denim and corduroy. I love corduroy!
  • The advice on top stitching is spot on.  I am now working on what will be my 'signature' pocket top-stitching design!
Cons

  • Front pockets are too small. I also prefer front pocket stays and will use them in future. I wanted to try out this pocket though as it was so quick and easy. I like it - I just prefer larger pockets and stays! And on the subject of pockets, I like the right side of my pretty fabric to be inside the pockets so that I know that is where the right side is. I don't like the right side showing on the inside of the jeans - it just seems wrong.

Alterations

  • When I fit the zipper, I align the zipper tape on the left with the centre seam. This moves my zipper further under the fly, ensuring that there is no 'zipper flashing'!
  • Took off about 1/2" on the side seams (both front and back leg pieces) in the hip area.
  • Sewed 3/4" side seams
  • Cut off about 6" on the waistband - and it was still a bit on the long side
So what is next?  Clearly I will be making more of these, and using my Christmas gift card from Mr. SDSC I bought fabric to make up another four pairs.  Different colours and weights of denim.  Woohoo!  I plan on using some leftover stretch red corduroy to make some test jeans that I can slice and dice for a better fit - especially in the lower butt area.  I have also traced off size 16 for the next pair and I think that will help with some of the fitting issues.  I think that I will need to wear this version with a belt, so a smaller size makes sense. 

I have posted a review on Pattern Review if you are interested!

Have you made jeans?  Would you consider it in the future?  How did they turn out?  I'd love to know!