Showing posts with label Kwik Sew 3422. Show all posts

Sunday, July 14, 2013

And 40 Buttonholes Later . . . .

I had two more shirts for Mr. SDSC and two for me!  A most productive week indeed!  As we would say in the UK - I've been cooking on gas!!!

Mr. SDSC was so pleased with his last shirt, that I thought I would make a couple more to practice techniques before I start playing around with the pattern and making it a better fit.  I used the same pattern, Kwik Sew 3422, and other than being more accurate with edge stitching a using a new foot for my Pfaff for the topstitching (boy that foot is spot on!), not much else changed. 

The first shirt is made from a gorgeous cotton with width-ways stripes, so I cut the pattern pieces out accordingly - I did not want horizontal stripes.  The thicker blue/grey stripe is woven like satin ribbon and has a different finish - it looks rather classy.

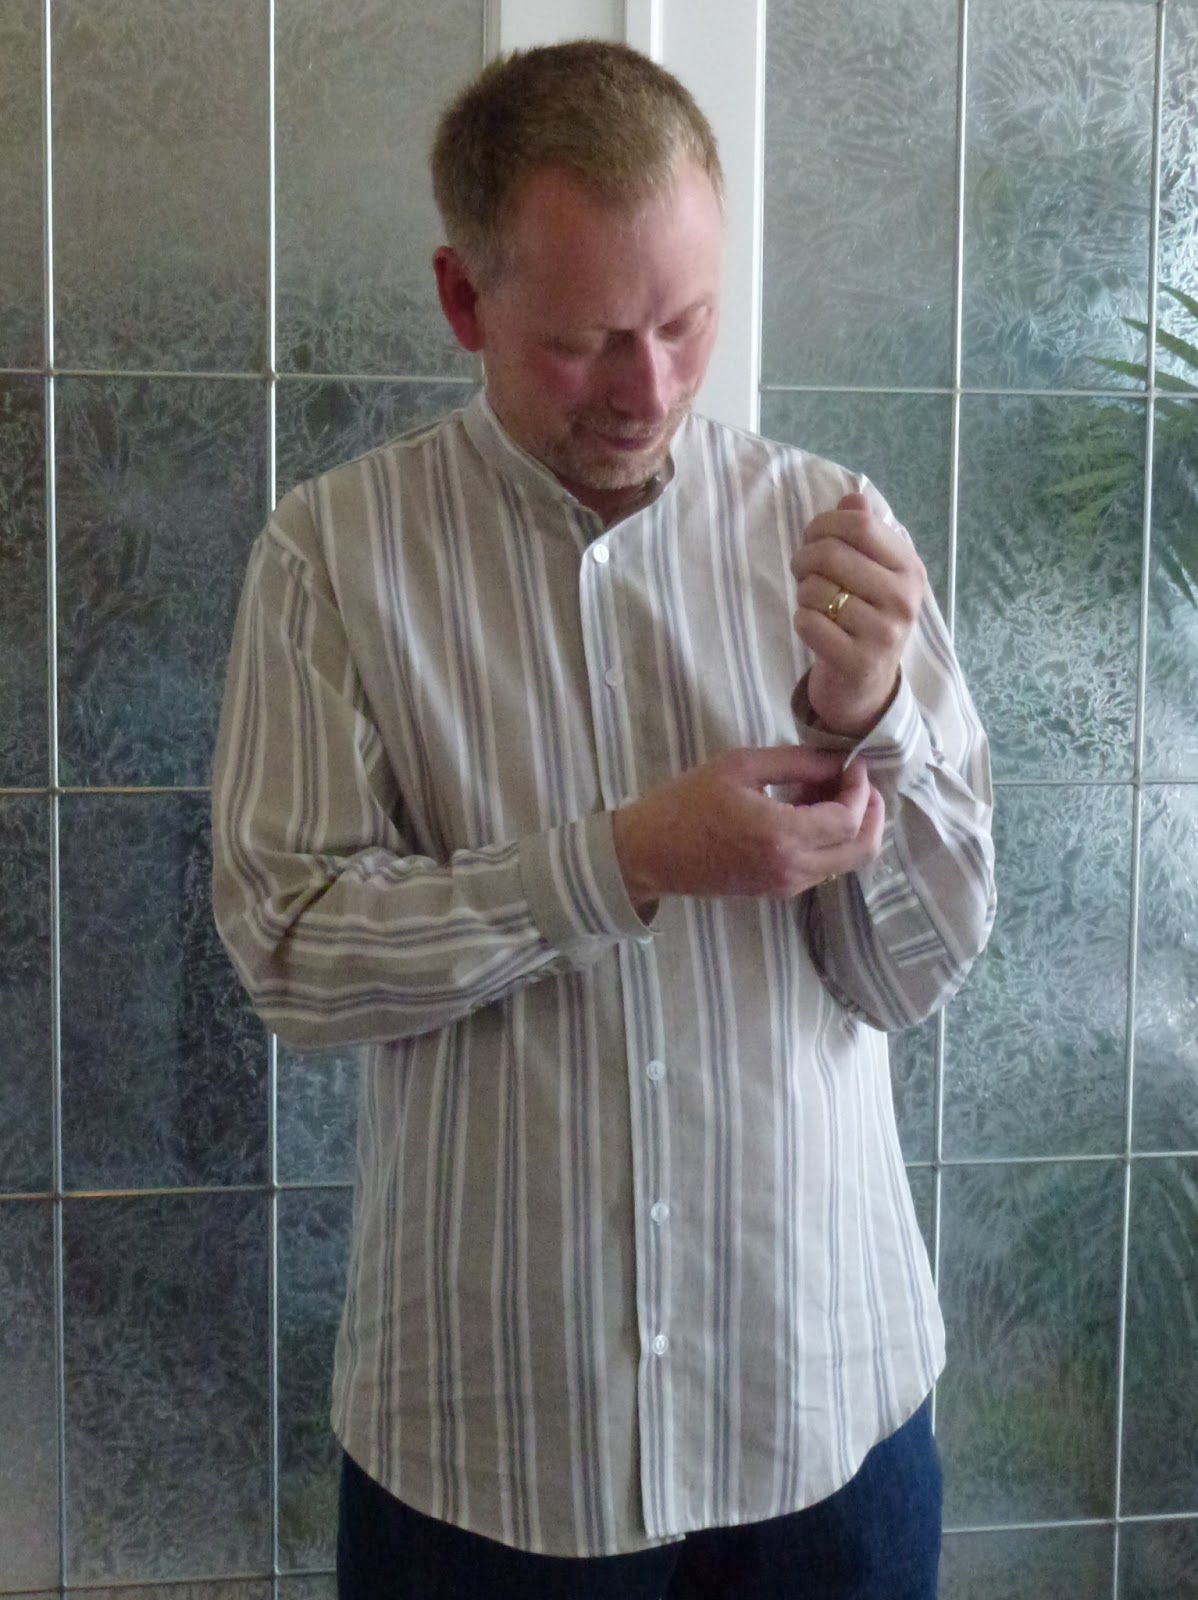


In retrospect, I think that the buttons may be a little big - they are 13mm, but I am thrilled with the buttonholes again (used the Featherweight).

The second shirt is a plain 100% cotton - slightly thicker fabric (I have a feeling it may actually be quilting cotton) and will make a greater cooler weather shirt.


Both shirts have 'grandad' collars which I think really suit him.  I will probably put some proper collars on the next shirts (although I have a black stretch poplin version already cut out).  I can cut one of these shirts out from 2m of 45" fabric and each one uses 12 buttons.  I must try and find somewhere where I can buy a 'bag' of buttons, as I am using rather a lot, so it is quite an inexpensive make.  You may have noted some blue marker around the buttonholes - the shirts have had to be washed to get this out - what do you use for marking buttons and buttonholes?  I do have a pen that fades within a day or two, so that may be better.

I made myself two more Singer Shapely Blouses, but the blue marker shows up so much on those that they cannot be photographed just yet!  They use 8 buttons each - I placed them 2" apart, and will probably go for 3" on the next versions, so all-in-all, four shirts = 40 buttons and buttonholes.  Phew!

So, alterations, the yoke on these shirts is somewhat flat in comparison to the roundness of Mr. SDSC adn I have read that you shouldn't alter them - but alter the backs and front pieces instead.  I will have to do some more research on this as the yoke appears to be (to me) where the fitting issues are.  In any case, they are not significant enough to cause a problem, and I know that these shirts will be worn to death!

A quick word before I go about divas models.  I am happy to make Mr. SDSC shirts, I am even happy to go out and purchase the fabric (it is tough but someone has to do it!), but I do expect some co-operation when it comes to photographing the finished garment.  This is what I was faced with today . . . .


A little less attitude next time methinks . . . . .

More pics on Flickr should you be interested!

Monday, July 1, 2013

A New Shirt for Mr. SDSC

I have been promising to sew a shirt for Mr. SDSC for as long as I can remember.  He really is a good sort.  He built me some great units in my sewing room to house my fabric collection/patterns etc., he doesn't complain when I disappear into said room for hours at a time, he is the main photographer on my 'shoots', and even helps me pin garments in areas I can't see/reach.  So, after many pleas from him, I splashed out the cash on the Tailored Shirt Class from Craftsy which included Kwik Sew 3422.


I dipped in and out of the Craftsy class (I haven't seen it all the way through yet!!) and also referred to a fabulous You Tube video by a great lady called Jacqueline Johnson.  Her way of attaching a collar is fabulous - I had really 'tight' edges.  Thank-you Ma'am!

A request was made for this shirt to just have a collar stand - no actual collar, so I was happy to oblige  I also decided not to add the front pocket.  I'm like that!!  The fabric is a woven cotton that I bought from Marshall's when I was in Edmonton on a business trip.


I am really pleased with this shirt.  It came together surprisingly easily and looks rather professional.  I used the seam allowance that the pattern had built in - 1/4" and my 1/4" foot - easy peasy!  Some of the seams (adding the sleeves to the armholes and the side seams) I serged and then sewed down those seams.  That gave a 'faux fell' seam look that is great for this wearable muslin.


Comments from the man himself?  He loves it (phew)!  He likes that it is longer than most of his other shirts - which is good as he is just over 6ft and needs the length.  The thought that the sleeves were a little baggy in comparison to his RTW shirts, so I will take a look at them and try a slimmer sleeve next time round.

My thoughts?  I would like to try fitting the yoke to his shoulders and upper back.  I think that would make the shirt hang better.  I need to be more aware of lengths - for example the plackets were fitted, the cuffs added and then I realized that the placket lengths were a slightly different - not enough to cause a problem, but I just need to measure the length prior to attaching the cuff.  Other than that, I can't recommend strongly enough Kwik Sew 3422, the Craftsy class, the Jacqueline Johnson video and also David Coffins' Shirtmaking book.  I will certainly be making this again and although this took quite some time, I am sure that I can shave a lot of time off the process next time round.  I have a lovely black cotton poplin with just a touch of lycra in it and I think that would look great.

Outtakes

This was Mr. SDSC's first photo shoot - he is usually on the other side of the camera, so he found it kind of hard to concentrate . . .


More info can be found on Pattern Review and I've loaded and more photos on Flickr.

Final view:

Mr. SDSC asked for a label to be inserted.  Your wish is my command, Sir :)