Wednesday, September 4, 2013

Travel Wardrobes - and Plus-Sized Pattern Pyramid Update

It seems as though I have been sewing lots of items, very few of which actually work with each other, and I am really not sure why.  Faced with having to choose clothes to take with me on my month long trip to Australia, I was a little worried about how much I would need to take with me.  I was also a little disappointed in myself for not having planned this out more carefully - after all, the tickets were bought a few months ago and I have had plenty of time to plan.  Having said that, I have spent some most enjoyable time reading the Vivienne files, which discusses wardrobe planning as well as Design Seeds for color inspiration and with the principle of making my clothes 'work', with that in mind, I tackled my wardrobe and selected some garments . . . . . 18 in total of which 7 are bottoms (6 skirts, one pair of cut off trousers), the rest are tops such as shirts, cardis and vest tops (shells).  In order to decide how well these clothes would work together, I had fun drawing rough diagrams on the back of an old 'page a day' calendar - and this is what I ended up with:


I am calling this my 'green/blue/orange' collection (above), from which I can make 7 'looks' - and that does not include doubling up by adding the cardi as an extra layer.  There are 3 RTW garments here - the blue sleeveless top, the orange sleeveless top and the blue cardi.  I have already blogged about the chartreuse shirt and Sorbetto, as well as the cabbage skirt.  The blue/green skirt is a simple 4-gore skirt made out of summery cotton, with a white cotton lining.  I was really pleased when these all came together - maybe this packing malarky may work out!


Next up is the 'pink and natural' collection'.  Again, 3 RTW items (pink cardi, pink sleeveless top, brown cardi) and from these 7 items, I will get 10 looks - also, not including adding the cardi's as extra layers.  The pink striped skirt was worn during Me Made May, and the natural shirt and Sorbetto are the same links in the first collection.

By now I was feeling pretty good, so I threw in two more skirts (brown RTW - 10 additional looks, white RTW - 10 additional looks) and a pair of cut off trousers in navy (RTW, 8 additional looks) - see below.


I now have more 'looks' that days, I really can't believe this!  I have thrown in 4 RTW white t-shirts/vests, my undies, a cream canvas jacket and a few lightweight scarves and I am WELL under my luggage limit!  Woohoo!!!  You know what that means . . . . . I can bring home lots of fabric :)

So, contrary to what I thought, my clothes have been co-ordinating rather well with each other.  What is very interesting is that this exercise highlighted the gaps in my wardrobe which I have filled with RTW clothes - I will focus on those items (cardis, skirts, cut-offs) in Spring next year as these collections are ostensibly Spring/Summer wardrobes.

Due to the nature of being on holiday - I hope to get lots of photos of these garments 'in action' . . and I hope to goodness that the weather holds otherwise I will be wearing all these tops with the jeans I am traveling in!!!

I am intrigued to know how you all co-ordinate your wardrobes - travel/work/play wardrobes - whichever ones are applicable to you?

A quick housekeeping update about the Plus-Sized Pattern Pyramid that I was lucky enough to win in May.  Unfortunately, I mislaid the winners address, and have been unable to make contact with her (Laura, if you read this, I have LOTS of patterns and will get another pyramid sent off to you!) and so I have been in contact with the runner up - the lovely Anne of  Pretty Grievances, and the patterns are on their way to her - so make sure you stalk her blog for a chance to win!!!

Monday, September 2, 2013

Summer Sorbettos

When I buy fabric, I often get a little more than I need.  Either that or I buy an amount that I think I will get a skirt and top, or trousers and jacket etc., etc., and it usually means that I have a half or full metre left over that ends up in a pile of 'not sure what to do with this but I don't want to throw away' fabric - do you have one?!  Well, after making these shirts, I found myself in the same predicament.

But this time . . . it actually worked and I had enough to make some more Sorbettos.  Yay!!


What do you think of the daisies at the bottom that form the hem?  They are actually one of the built in stitches on my Pfaff - it does not have very many, but it certainly makes up for it with this one,  Although you can't quite see it in these photos, the centres of the daisies actually form a small hole, so they look like eyelets.  Love them!

Here are a couple of photos of the chartreuse top.


I also have a charcoal grey shirt and Sorbetto cut out and had hoped to have them finished before my Australia trip . . . . unfortunately that was not the case - but it does mean that I will have some sewing ready for me when I return!!

Tuesday, August 20, 2013

A Trio of Shirts

Wow - how time flies when you are busy sewing!  So busy that I forgot to post . . . . !  I have been somewhat preoccupied planning a trip abroad and wanted a few 'mix and match' tops to wear so I picked up some lovely linen and linen/rayon fabric in natural and chartreuse and got to work.

I decided to make three (actually, I have made four, but I forgot to photograph one of them!) more of the Shapely Blouses from Singer Perfect Plus -


This last photo best captures the color, and yes, I know, it really needed another pressing before it's debut!!  The previous shirt had a lot of excess in the back near the bottom of the seam, so I took this out and I think it looks a lot better now.  I serged all the seams and added a faux-fell seam to all seams (which unfortunately does not show on these photos).  I found that it has given a more professional looking finish.

This second shirt is from a natural linen.  Same design/finishes etc -


Pretty much the same as the chartreuse one, but I managed to find some mid-brown semi-opaque button that look rather lovely!  I used my Singer Featherweight again for the buttonholes (oh how I love that machine!)  This is the first time that I have sewn with linen - so I made sure that I followed all the advice to wash/dry it multiple times!  But boy, I was not prepared for the way the stitches just 'sink' into the fabric when it is pressed.  Lovely!

The last shirt is made from a woven striped patter.  As it does not crease very much I suspect that it has some poly in it, and it came from my Mum's collection -


A couple of quick comments - I managed to pick up some coat-hangers that have a black 'flocked' finish to them, almost like velvet.  They were terribly cheap, but they really 'grip' the shoulders of my tops, especially shells and knitwear - and you can see them poking out in some of these photos.

Secondly, I have to apologise for not having 'posed' photos.  Having recently moved house (OK, that was almost 6 months ago!) I can't find my tripod and never seem to be organised enough to arrange a photo shoot when I have a photographer around.  However, these clothes will be coming with me on my holidays next month so I will get lots of 'real' pics then!!

I do find that tops are my nemesis - I can sew up skirt or some simple trousers quite quickly now, so I am rather thrilled to be able to sew up these tops that fit pretty well and look good.  I plan to play around with the pattern and lift the neckline, add long sleeves and maybe add an attached facing as the collar and facing on these take up about 1/2m of interfacing.  Phew!

How about you - what is your sewing nemesis?

Thursday, July 25, 2013

Sweet Dreams . . . .

The lovely Rhonda has been blogging for some time about sewing pillowcases for Mary Bridge Children's Hospital, and says:

. . . . They have a very interesting charity, pillowcases for the children who come to the hospital. The hospital gives out over 900 pillowcases every month. The children are allowed to choose their pillowcase from those that are donated. This was the sponsored charity event of the Sewing and Stitchery Expo held in Puyallup, WA this year. They have found that the pillowcases bring so much comfort to the children. . . . .

Rhonda thought (quite rightly) that this would be a fabulous project to be involved in, and is co-ordinating the collection and disbursal of 900 pillowcases - one month's supply.  As of today's date, she has received 260 pillowcases.  Wow! That equates to 260 comforted children.  So I have decided to play . . . .

Although I do not sew that much 'non-clothing', I do have a rather impressive amount of quilting fabric passed down from my Mum.  There is more than I would ever use with my projects, and I thought that this would be a great use of the fabric - and I know my Mum would approve!  Last weekend I cut out some fabric and got sewing . . . . 


As you can see from the picture below, I used slightly different instructions than those that Rhonda has suggested, (I got a bit confused, did a Google search, and used this great tutorial).  What I particularly liked was that there are no raw seams - they are all hidden! 
 

These pretty flowery pillowcases were the first ones I made.


And then I hit Mum's Christmas fabric.  What I like about this project is that three metres of fabric makes three pillowcases.  Out of each metre you cut one main piece, one accent piece and one trim piece, mix them all up and you have three 'co-ordinating but slightly different' pillowcases.


It is interesting to see how the patterns and colors play out against each other :)


And here is my little stack!


Sew, 10 pillowcases that will be on their way to Rhonda, and I hope that means 10 children whose hospital visit is made a little easier.

If you fancy taking part - drop on over to Rhonda's blog, and get sewing!!

ETA:  You can see Rhonda's post about my pillowcases here!

Sunday, July 14, 2013

And 40 Buttonholes Later . . . .

I had two more shirts for Mr. SDSC and two for me!  A most productive week indeed!  As we would say in the UK - I've been cooking on gas!!!

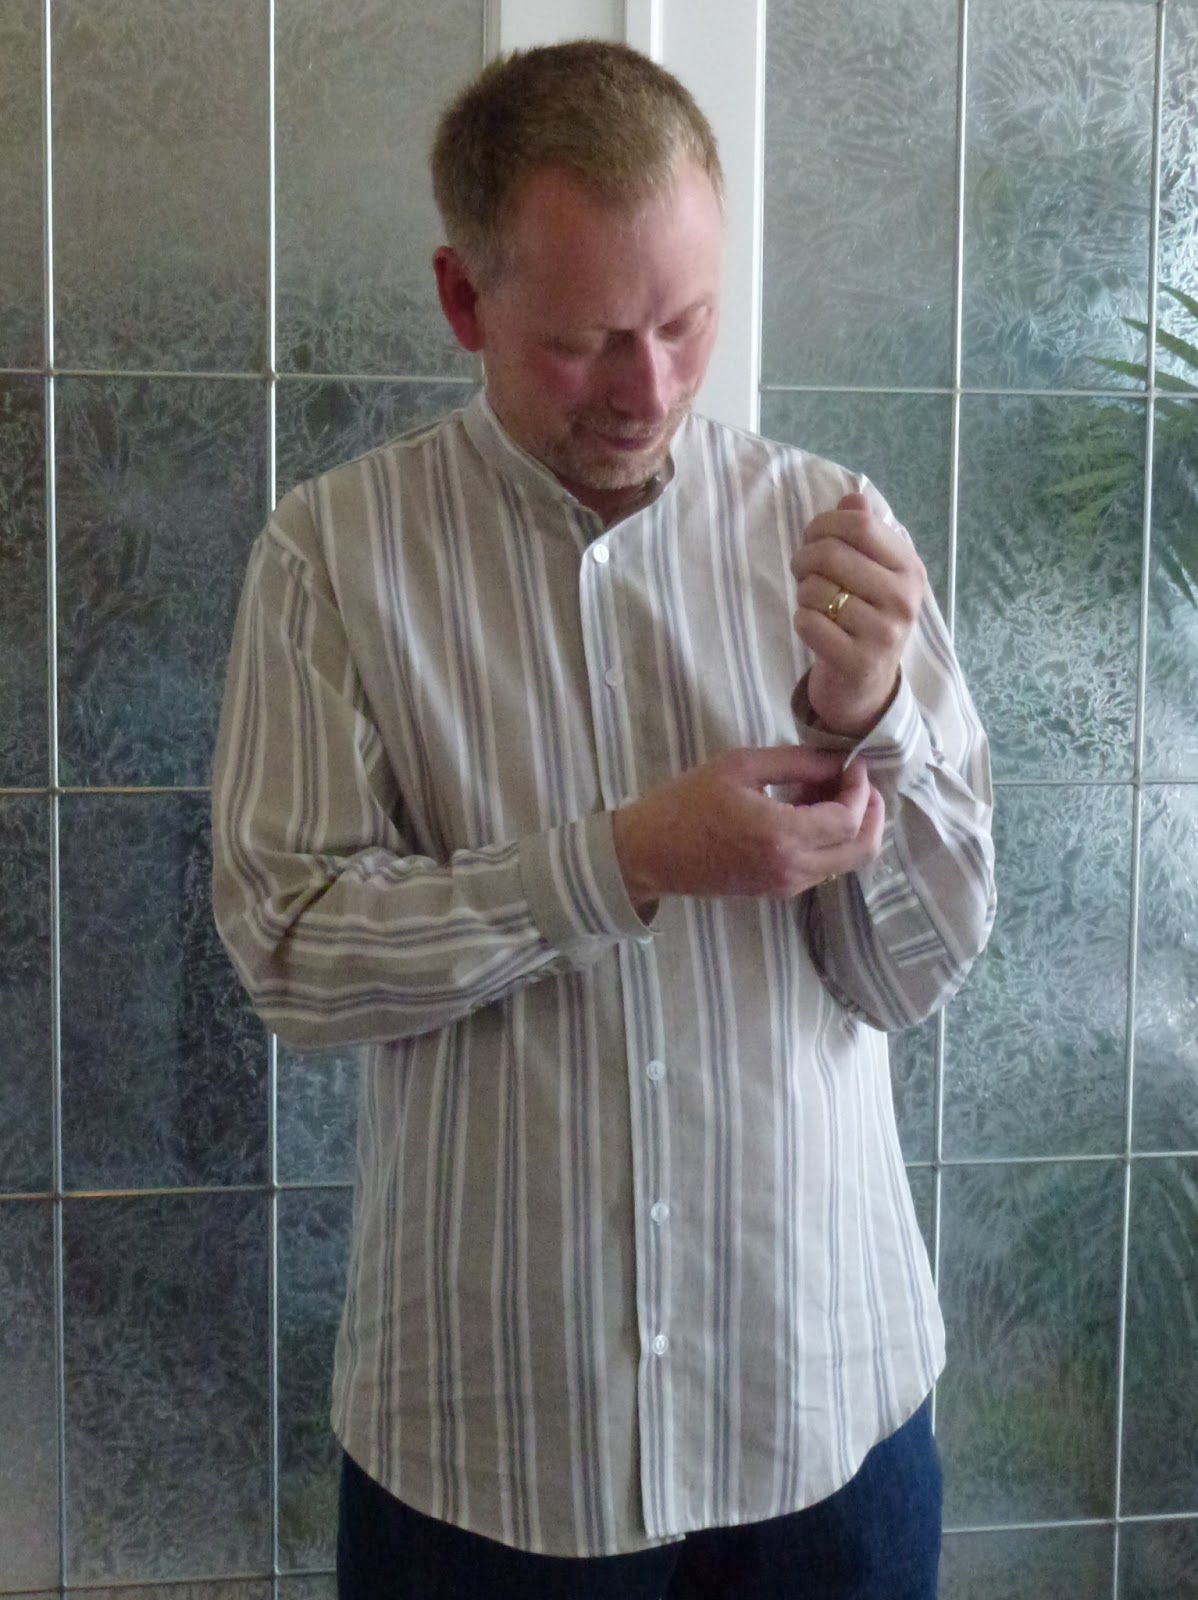
Mr. SDSC was so pleased with his last shirt, that I thought I would make a couple more to practice techniques before I start playing around with the pattern and making it a better fit.  I used the same pattern, Kwik Sew 3422, and other than being more accurate with edge stitching a using a new foot for my Pfaff for the topstitching (boy that foot is spot on!), not much else changed. 

The first shirt is made from a gorgeous cotton with width-ways stripes, so I cut the pattern pieces out accordingly - I did not want horizontal stripes.  The thicker blue/grey stripe is woven like satin ribbon and has a different finish - it looks rather classy.


In retrospect, I think that the buttons may be a little big - they are 13mm, but I am thrilled with the buttonholes again (used the Featherweight).

The second shirt is a plain 100% cotton - slightly thicker fabric (I have a feeling it may actually be quilting cotton) and will make a greater cooler weather shirt.


Both shirts have 'grandad' collars which I think really suit him.  I will probably put some proper collars on the next shirts (although I have a black stretch poplin version already cut out).  I can cut one of these shirts out from 2m of 45" fabric and each one uses 12 buttons.  I must try and find somewhere where I can buy a 'bag' of buttons, as I am using rather a lot, so it is quite an inexpensive make.  You may have noted some blue marker around the buttonholes - the shirts have had to be washed to get this out - what do you use for marking buttons and buttonholes?  I do have a pen that fades within a day or two, so that may be better.

I made myself two more Singer Shapely Blouses, but the blue marker shows up so much on those that they cannot be photographed just yet!  They use 8 buttons each - I placed them 2" apart, and will probably go for 3" on the next versions, so all-in-all, four shirts = 40 buttons and buttonholes.  Phew!

So, alterations, the yoke on these shirts is somewhat flat in comparison to the roundness of Mr. SDSC adn I have read that you shouldn't alter them - but alter the backs and front pieces instead.  I will have to do some more research on this as the yoke appears to be (to me) where the fitting issues are.  In any case, they are not significant enough to cause a problem, and I know that these shirts will be worn to death!

A quick word before I go about divas models.  I am happy to make Mr. SDSC shirts, I am even happy to go out and purchase the fabric (it is tough but someone has to do it!), but I do expect some co-operation when it comes to photographing the finished garment.  This is what I was faced with today . . . .


A little less attitude next time methinks . . . . .

More pics on Flickr should you be interested!

Sunday, July 7, 2013

Singer Perfect Plus - update

I am excited to say that I have been on a bit of a roll sewing wise.  It is interesting to note (well, it is for me anyway!!) that I work better when I have a number of items cut our and ready to go.  It can take a good day or so to get lots cut out and then I can disappear into my sewing room and can work for ten minutes, three hours, whatever time I have available.  So, when I cut out Mr. SDSC's shirt, and my Chartreuse Sorbetto dress, I also cut out a couple of pairs of trousers and a top for myself.  And here are the results!


First up is a pair of grey trousers made out of suiting with a touch of lycra.  They hang really well, but are a little too heavy for the summer - they will be really warm in the winter.  I put side pockets in these and I am not that happy with them.  Pockets don't excite me like they do with others, so I will probably not put them in the next pair.


Just look at how they hang at the back (forget the dodgy pocket peeking out on the left!), I am just thrilled that they don't bunch up under my butt like my old RTW trousers do.  I used McCalls 5239 again - I love that pattern!

Hey, I hear you shout - that's a cute top . . . you know what, I have all sorts of conversations in my head, and I guess this is one of them . . . well thank-you!  I really want to make a great co-ordinated work wardrobe.  Although I work in an environment where casual clothing is acceptable, I personally like to dress up a bit and 'look the part'.  Using the information and suggestions in the Singer Perfect Plus book, I made the 'shapely shirt' out of some cotton with lovely woven thick and thin stripes.  I made a number of alterations such as a FBA, sway back and rounded back adjustment.  All in all, I am happy with this.  Seeing the photos of the back, it looks as though I can take in the excess fabric under the swayback adjustment - you can see it in the photo above where the fabric sticks out and catches the light.  I like the cute little sleeves and I love a collar on my tops as they help disguise my rounded upper back.

As with Mr. SDSC's shirt, I used my old, old, Singer Featherweight and buttonholer attachment to make the buttonholes.  Boy that is a good combination!

The other pair of trousers are from some black suiting that has woven black on black stripes that you cannot see in these photos, but they do look rather smart.


Again, I am really please with how they hang, and I am happy to be able to knock these out with some consistency, quickly and easily.

The same pattern (with more generous seam allowances) also made these jimmy jam trousers:


And the cute socks?  They were a 'mystery sock pattern' on Ravelry.  They have little glass beads down the side and are very soft and smooshy!


Well, having polished off that sewing, I am ready to have another cutting out marathon.  I have three lengths of linen/rayon in grey, natural and chartreuse, so I plan to cut out a 'shapely blouse' and a Sorbetto from each of the lengths.


These will be part of my 'Antipodean Adventure' collection for my trip to Australia.  The blouse and the Sorbetto can be worn on their own, or layered with the blouse acting as a lightweight jacket.  I also have fabric for three more shirts for Mr. SDSC and finally, oh yes finally, I am going to cut out my Oscar de la Renta shift dress.  The fabric has been washed (a 70/30 wool/silk houndstooth) that I planned to make for the Pattern Review RTW competition that  never made.  Here is the original version that I love so much!


So there we go, that should keep me busy for a while - what about you?

Friday, July 5, 2013

Buttonholes - Featherweight Style

Picture the scene . . . I had almost completed the first shirt for Mr. SDSC, and all I needed to do was add the button and buttonholes.  I checked out how to make the buttonholes on my Pfaff 2020 Tiptronic machine.  Put some test fabric under the foot and voila.  What a nightmare.  I was so disappointed.  Despite an intertubes search, I could not find any top-tips, and the manual was sadly lacking.  I considered chatting up Mr. SDSC and seeing how he felt about me spending @$1000 on a new machine that would make fancy smancy buttonholes, then thought how I would prefer to spend it on fabric instead, and so I dragged out my lovely Singer Featherweight.


It is in really good condition, and I knew it would work with my singer buttonhole attachment:


I just love how it all fits into the space age container.  This attachment cost about $25 and made perfect buttonholes on the shirt.


OK, so maybe it is a little hard to see white buttonholes on white stripey fabric with white buttons, but I am trying!

All-in-all I am thilled with these buttonholes - the time it took to set up this machine and buttonholer took only a few minutes - and will use this set up in future.  I know that I am lucky to have more than one machine, but it makes you realize why professional dressmakers (and non-professionals as well) have dedicated machines for different processes.  It is also interesting that a machine that it over 60yrs old and a buttonholer of about the same age still make perfect buttonholes.  I love my Pfaff in so many ways, but buttonholes are not its speciality!

What about you?  Do you have any equipment/notions that you find are far superior to their modern day counterparts?